To remove a volume, select option 4 (Remove) in the Opt (Option) column next to the volume you want to remove on the Work with Optical Volumes display.
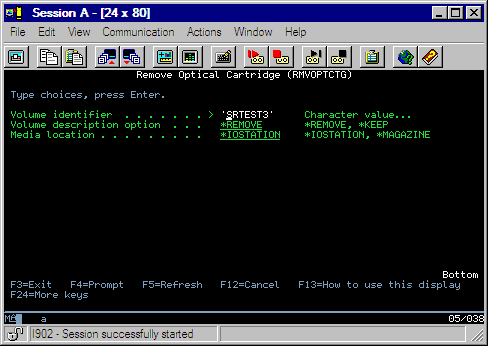
You can then remove an optical volume by physically removing the optical disk cartridge from the optical library dataserver. The Remove Optical Cartridge display in the figure below appears and prompts you for additional information.

Enter the information for the following fields:
- Volume identifier
- Volume description option
- Removed cartridge location (if *KEEP was specified as the volume description option)
- Media location: Some 399F models support removing media to the bulk magazine. *MAGAZINE can be specified to use this feature if it is available for the device. The magazine can be removed by specifying VOL(*MAGAZINE) on this command.
Because there are two volumes on each optical disk, the options selected on the Remove Optical Cartridge display apply to both volumes.
- Volumes in directly-attached optical media libraries
- Volumes in CD-ROM and DVD devices
- Volumes in virtual optical devices
Deleting removed volumes from the optical index database
If you removed (*REMOVED) the volume but saved the volume description information, you can later delete that information by selecting option 9 (Delete). The delete option can also be used if a volume has been marked as being in an offline device. The delete option removes a single volume, and not both volumes of an optical cartridge.
- Removed volumes from an optical media libraries
- Volumes in an offline optical media libraries
- Volumes in an offline optical LAN device

