To remove the shipping brackets from your server, follow these
instructions.
Before you can install features, you need to access the inside
of the servers. To do so, complete the following steps:
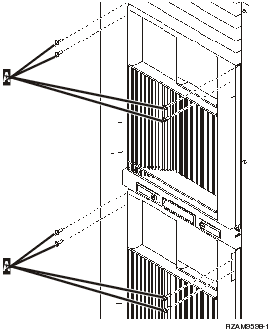
- Remove the screws A that attach each of the four shipping
brackets to the front of the rack.

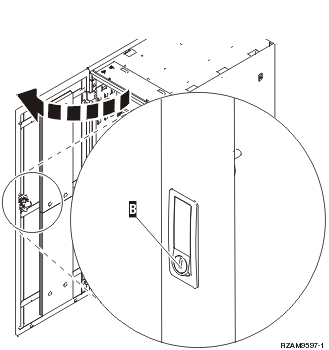
- Move to the back of the rack, press the latch B, and open
the door.

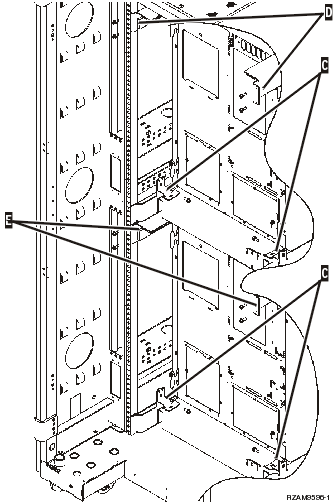
- Remove the screws that attach each of the four angle brackets C located
on the sides of the server trays.

- Remove the screws that attach the upper shipping brackets D to
the back of the rack.
- Remove the two shipping brackets D from the upper server
through the back of the rack. Push up firmly to remove them.
Note: Save the shipping brackets and use them if the rack is moved
in the future.
- Go to the front of the rack.
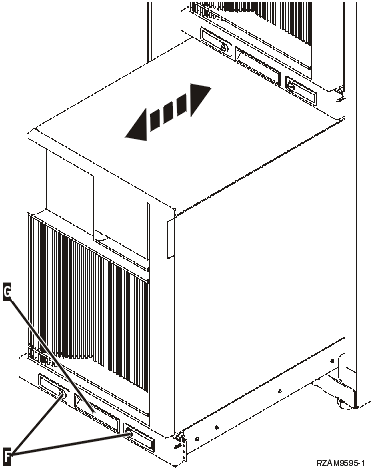
- Press the latches F and pull the lower server out using
the handle G.

- Go to the back of the rack.
- While supporting the lower shipping brackets, remove the screws E that
attach the brackets to the rack. Remove the shipping brackets from the back
of the rack.
Note: Save the shipping brackets and use them if the
rack is moved in the future.
- Slide the server back into the rack.