Create a view over a single table

The following example shows how to create a view on a single table. The view is built on the INVENTORY_LIST table. The table has six columns, but the view uses only three of the columns: ITEM_NUMBER, LAST_ORDER_DATE, and QUANTITY_ON_HAND.

To create a view over a single table:
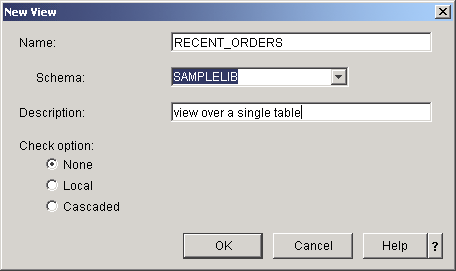
  1. In the iSeries™ Navigator window, expand the system that you want to use.
  2. Expand Databases and the database that you want to work with.
  3. Expand Schemas.
  4. Right-click SAMPLELIB and select New, then View.
  5. On the New View window, type RECENT_ORDERS in the Name field.
  6. Specify SAMPLELIB in the Schema field.
  7. Optionally, you can specify a description.
  8. Select a check option. A check option on a view specifies that the values inserted or updated into a row must conform to the conditions of the view. For this view, select None.
  9. Click OK. The New View definition window appears.


    screen capture of new view window

  10. On the New View window, click Select tables.
  11. On the Browse for Tables window, expand SAMPLELIB, then select INVENTORY_LIST.
  12. Click Add.
  13. Click OK. INVENTORY_LIST should now be in the work area on the New View window.
  14. To choose the columns that you want in the new view, click them in the selected tables and drag-and-drop them in the selection grid on the bottom half of the window. Select ITEM_NUMBER, LAST_ORDER_DATE, and QUANTITY_ON_HAND.
  15. The order that the columns appear in the selection grid is the order that they will appear in the view. To change the order, select a column and drag it to its new position. Put the columns in the following order: ITEM_NUMBER, LAST_ORDER_DATE, QUANTITY_ON_HAND.